Understanding the Appeal of diy wood slat wall
The allure of a diy wood slat wall lies in its blend of aesthetic charm and functional versatility. This style has become increasingly popular, resonating with homeowners and designers alike. A well-crafted wood slat wall can serve multiple purposes: it enhances the visual appeal of a space, adds texture and warmth, and can even improve acoustics. This article will delve into the multifaceted advantages of incorporating a wood slat wall into your home, while guiding you through the materials, installation processes, and creative ideas to ignite your inspiration.
Benefits of Incorporating diy wood slat wall
One of the primary benefits of a diy wood slat wall is its ability to transform a mundane space into a visually striking environment. Here are several reasons why homeowners are opting for this design:
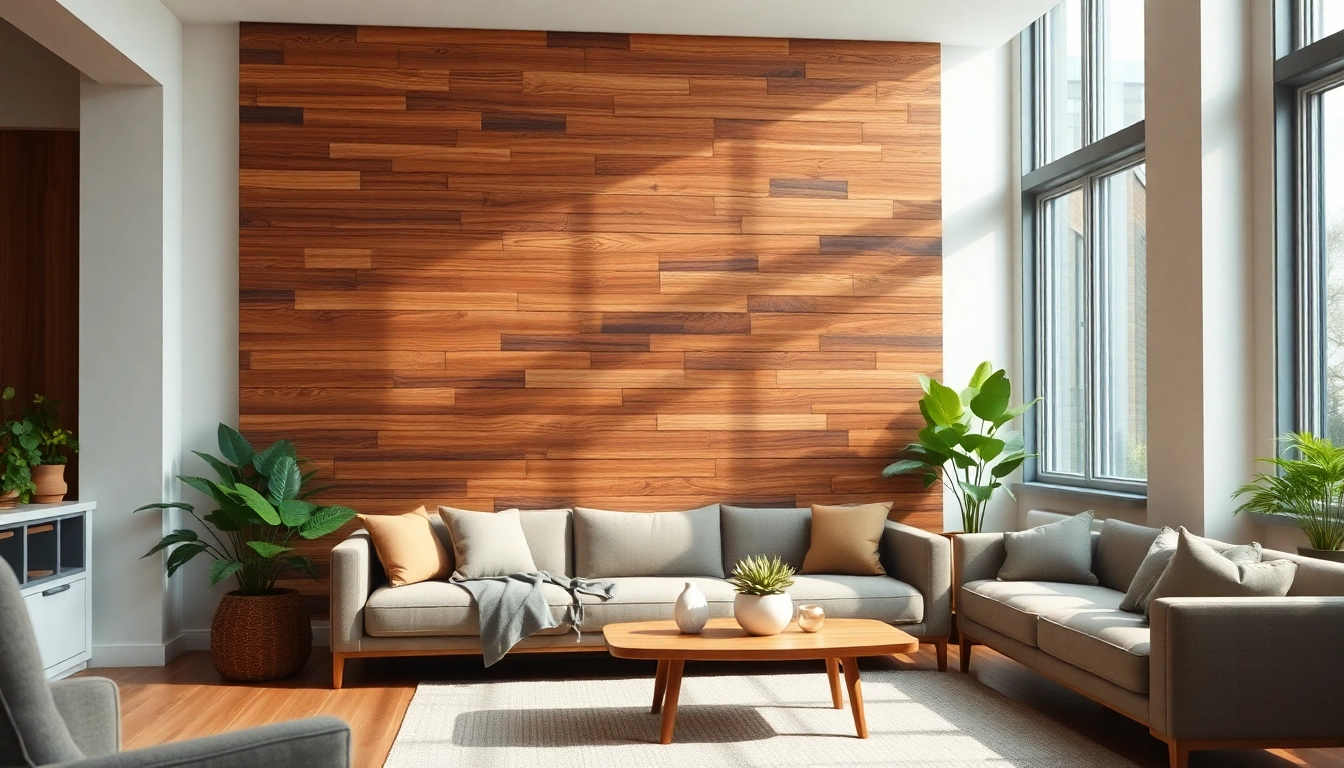
- Enhanced Aesthetics: Wood slat walls add depth and texture, which can dramatically change the perception of a room. They can align with various design styles, from minimalist to bohemian, ensuring versatility in aesthetics.
- Improved Acoustics: The slats can absorb sound waves, making an area quieter. This is particularly beneficial in larger spaces or home offices where noise control is essential.
- Eco-Friendly Options: Utilizing reclaimed wood or sustainably sourced timber helps reduce environmental impact while providing a unique character to each installation.
- Increased Property Value: A well-executed diy wood slat wall can be a selling point when listing your property, adding significant value and appeal to potential buyers.
Design Versatility and Aesthetic Benefits
The design versatility offered by a diy wood slat wall is virtually limitless. It can serve as an accent wall, a decorative partition, or even a backdrop for specific areas within your home. Depending on the layout and color options you choose, wood slats can harmonize with other elements in the room or stand out as a statement piece.
Moreover, they can be painted or stained to fit the color scheme of your decor, allowing you to customize the final appearance. Light and dark woods can evoke different moods; for example, lighter woods can brighten a space, while darker tones create warmth and richness.
Popular Applications in Home Decor
There are myriad applications for a diy wood slat wall in modern home decor:
- Living Rooms: Create a focal point behind your sofa or media center.
- Bedrooms: Consider a wood slat feature behind the bed to evoke a serene and inviting atmosphere.
- Offices: Use slats as an acoustic solution and a backdrop for your workspace.
- Bathrooms: Incorporate wood slats for a spa-like feel, enhancing relaxation and wellness.
Materials Needed for Your diy wood slat wall
To embark on your diy wood slat wall project, it is essential to gather all the necessary materials. Below is a comprehensive list of what you’ll need to create your slat wall successfully.
Essential Tools and Equipment
Having the right tools can make a significant difference in the ease and quality of your installation:
- Measuring Tape: Accurate measurements are crucial for a seamless fit.
- Level: Ensures your slats are perfectly aligned.
- Saw: A table saw or circular saw can help cut slats to your desired length.
- Drill: Used for making holes and inserting screws for mounting.
- Stud Finder: Useful for locating the best points to anchor your slats securely.
- Sandpaper: Helps to smooth the edges of your wood and prepare it for finishing.
- Paintbrush or Roller: For applying any paint or finish to your slats.
Choosing the Right Wood for Your Project
The type of wood you select will significantly affect the final appearance and durability of your diy wood slat wall. Here are some popular wood choices:
- Pine: An affordable and readily available option that is easy to work with.
- Walnut: Offers a rich color and grain, making it an excellent choice for contrast.
- Birch: Known for its fine grain and light hue, perfect for light and airy spaces.
- Reclaimed Wood: Provides a unique character and eco-friendly solution.
Optional Finishes and Treatments
Adding a finish to your wood slat wall can enhance its beauty and longevity:
- Stain: A stain can deepen the color of the wood while allowing its grain to show through.
- Paint: Choose a color that complements your room; chalk paint offers a trendy matte finish.
- Sealant: A clear sealant protects the wood from wear while adding a sheen.
Step-by-Step Process to Build a diy wood slat wall
Creating a diy wood slat wall is a rewarding project that can be accomplished with careful planning and execution. Below is a detailed guide to help you through the process.
Preparation: Planning and Measurements
Before you begin, take time to plan your project. Start by measuring the wall area where you intend to install the slats. Make sure to account for any outlets or switches present on the wall. Sketch a design that includes the spacing of the slats, which typically ranges between 1 to 4 inches apart, depending on your aesthetic preference.
Installation Techniques and Tips
Once you have all your materials ready, follow these installation steps:
- Locate the Studs: Use a stud finder to mark the studs on your wall, as they will provide the support needed to secure your slats.
- Cut Your Slats: Tailor your slats to size according to your measurements, making sure to sand the edges for a smooth finish.
- Mark Your Layout: Use a level to draw vertical lines where each slat will go, ensuring even spacing throughout.
- Install the First Slat: Begin from the bottom or top and work your way to the opposite end, securing your slats with screws into the wall studs.
- Continue Installing: Use spacers to maintain the gaps between slats as you install the remaining pieces.
Finishing Touches to Enhance Your Wall
After the slats are securely in place, consider adding finishing touches:
- Caulking: Fill in any gaps with caulking to create a seamless appearance.
- Lighting: Highlight your new wall with accent lighting that enhances the beauty of the wood.
- Decor: Decorate the wall with artwork, plants, or shelves to personalize the space further.
Common Mistakes to Avoid with diy wood slat wall
While the process of building a diy wood slat wall can be straightforward, avoid these common pitfalls:
Miscalculations: Measuring and Sizing
One of the most common mistakes in DIY projects is miscalculating measurements. Double-check everything to avoid unnecessary waste or frustration during installation. Ensure your measurements reflect the exact area you wish to cover.
Poor Material Selection and Quality Issues
Selecting low-quality materials can lead to issues down the line, such as warping or splitting. Always opt for high-quality wood and finishes to ensure longevity and durability in your project. Research the wood type and quality before purchase.
Neglecting Maintenance and Care
Once your diy wood slat wall is complete, don’t neglect its upkeep. Regular dusting and occasional cleaning with a soft cloth will keep it looking fresh. If you’ve applied stain or sealant, be sure to follow care instructions for maintenance.
Inspiration and Creative Ideas for Your diy wood slat wall
Let your creativity flow as you think about how to personalize your diy wood slat wall. Below are some ideas for inspiration:
Storytelling Through Design: Personal Touches
Think about incorporating elements that tell your story or represent your interests. For example, you could mount family photos or mementos on your slat wall to create a unique visual narrative.
Innovative Lighting Solutions for Impact
Consider installing LED strip lights along the panels to create a dramatic effect, especially in the evening. Lighting can enhance the natural beauty of the wood and bring a contemporary twist to your design.
Combining Styles: Mixing with Other Decor Elements
Don’t hesitate to mix styles! For instance, a rustic wood slat wall can be paired with modern furniture for an eclectic look. Accessorizing with metallic or glass items can also provide a contemporary balance.